DNX ONE TUTORIAL
Version: 1.4
Author: Pietro Marmelo
Revision: Pietro Marmelo
DNX-ROOT role for the DNX Well Architected Foundation
In this tutorial, we will show how to set up the dnx-role that will give DNX secure access to create the DNX Well Architected Foundation environments and check your Master Account ID.
Prerequisites:
- AWS Admin Access to your AWS Master Account
Steps:
 Link
Link
- Login to AWS console.
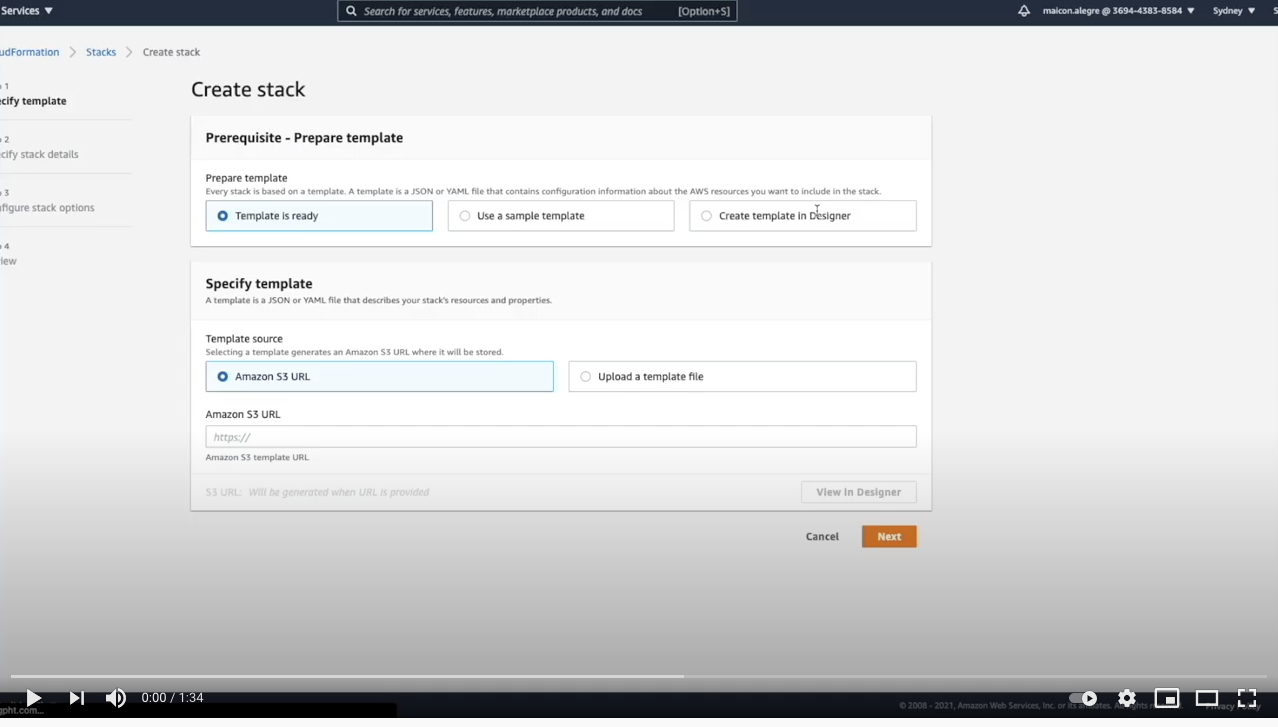
- Go to Services and type “CloudFormation”.
- Click on CloudFormation.

- Click on Create stack

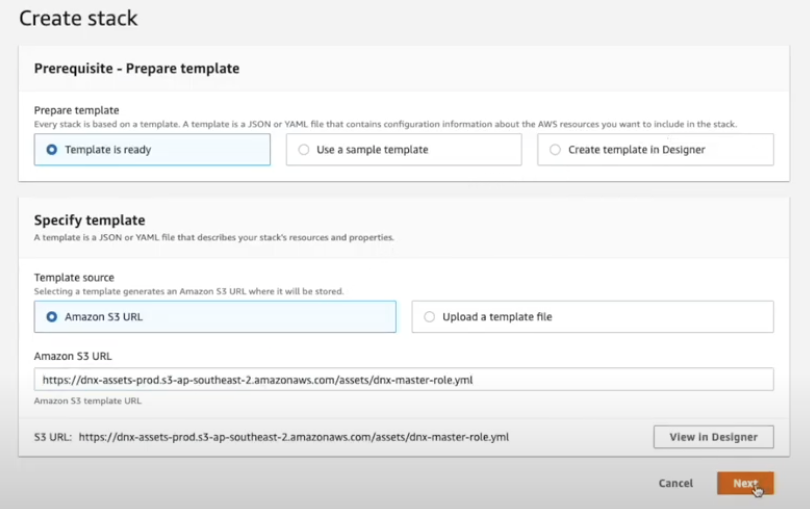
- On the next page insert the stack link on Amazon S3 URL. Stack link: https://dnx-assets-prod.s3-ap-southeast-2.amazonaws.com/assets/dnx-master-role.yml

- Click Next.
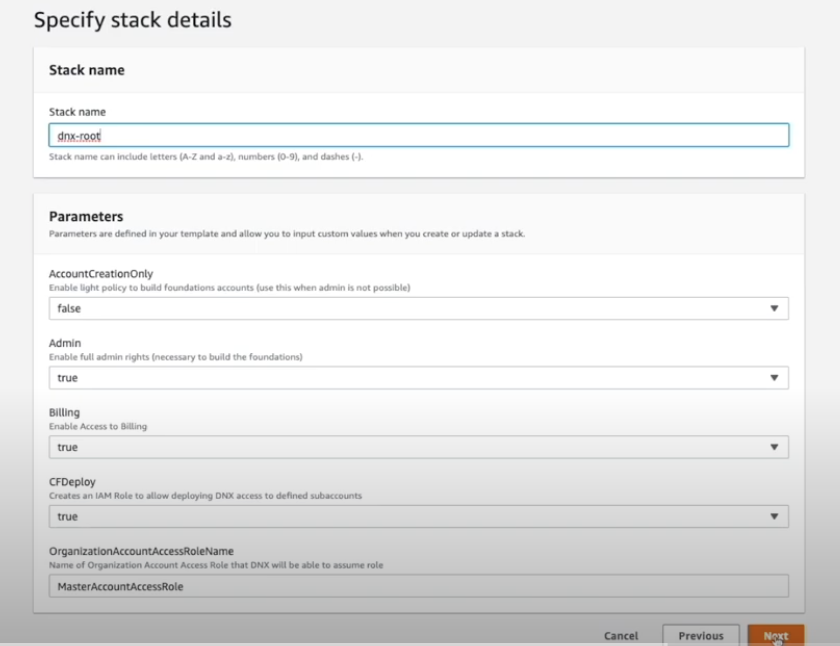
- Insert the stack name “dnx-root”.
- In the Parameters area we have five options to choose (AccountCreationOnly, Admin, Billing, CFDeploy and OrganizationAccountAccessRoleName). By default our stack will set up a full access role and grant DNX access for Billing. Click Next.
- AccountCreationOnly gives permission to DNX to create only new accounts inside the Master Account. Default “False”. ** Admin access is required to build all Foundations features (default permission). Default “True”. * Billing gives DNX permission to access the billing service and create cost reports. Default “True”. ** CFDeploy gives DNX permission to access the new accounts. Default “True”. ***** OrganizationAccountAccessRoleName default role name used by DNX to assume new roles. Leave as default.

- On Configure stack options click Next.
- On the Review page, mark the checkbox “I acknowledge that AWS CloudFormation might create IAM resources with custom names” and click in Create stack.

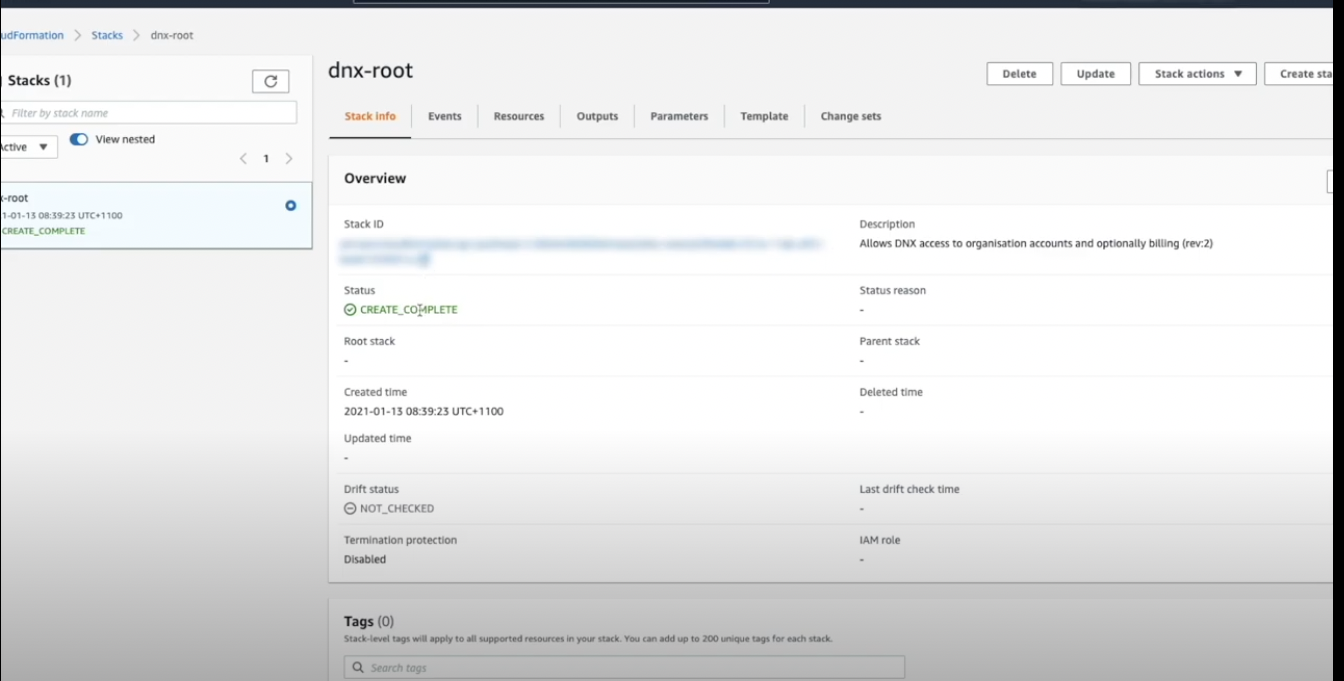
- On the Next page, wait for a few minutes and click in Refresh until the process is completed.

- When the status changes to CREATE_COMPLETE, the process is done. Account ID (Master Account). Each Amazon account has an associated 12-digit account identifier (ID). This identifier needs to be sent to DNX to start the Well Architected Foundation.
Below is a way to know your account number.
- Log in to the AWS Management Console.
- At the top of the page, click the link that is your account name.
- Click My Account.
- Your 12-digit account ID is listed under Account Settings.
When the dnx-root role is created please notify DNX and send us the Account ID number.